This translation is older than the original page and might be outdated. See what has changed.
Sidebar

en:vrm:make
Table of Contents
Create VRM
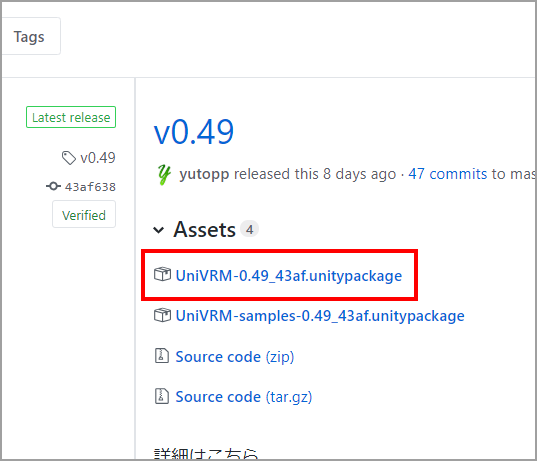
Download UniVRM
Go to GitHub release page.
We will need a unitypackage for UniVRM.
The latest version as of 14th June 2019 is “UniVRM-0.53.0_6b07.unitypackage”.
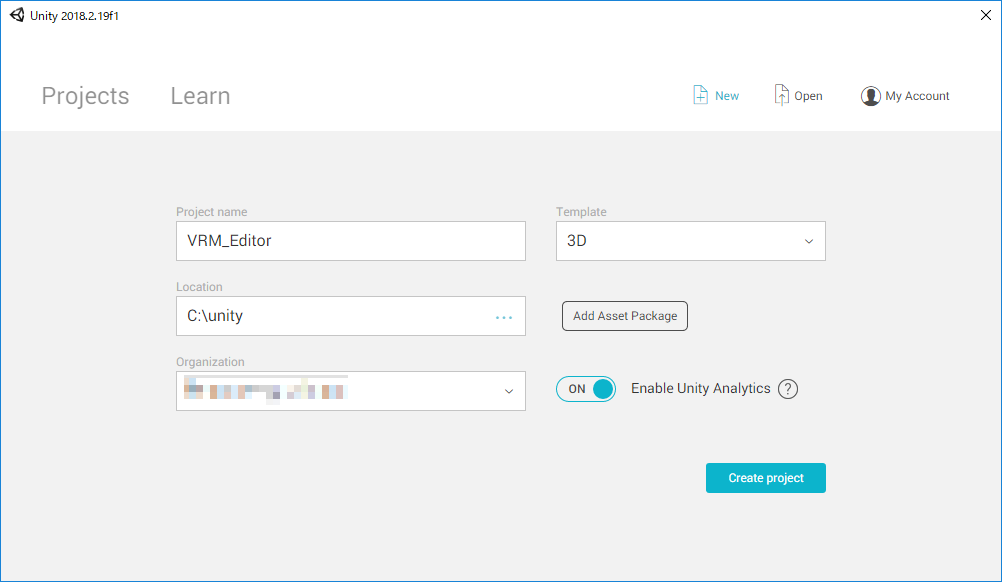
Create a project for VRM creation
Open Unity and create a new project.
Enter a recognizable name in [Project name] and click [Create project].
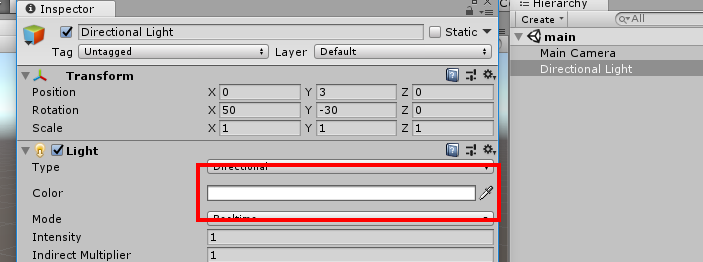
Change the color of Directional Light to white to see the colors correctly.
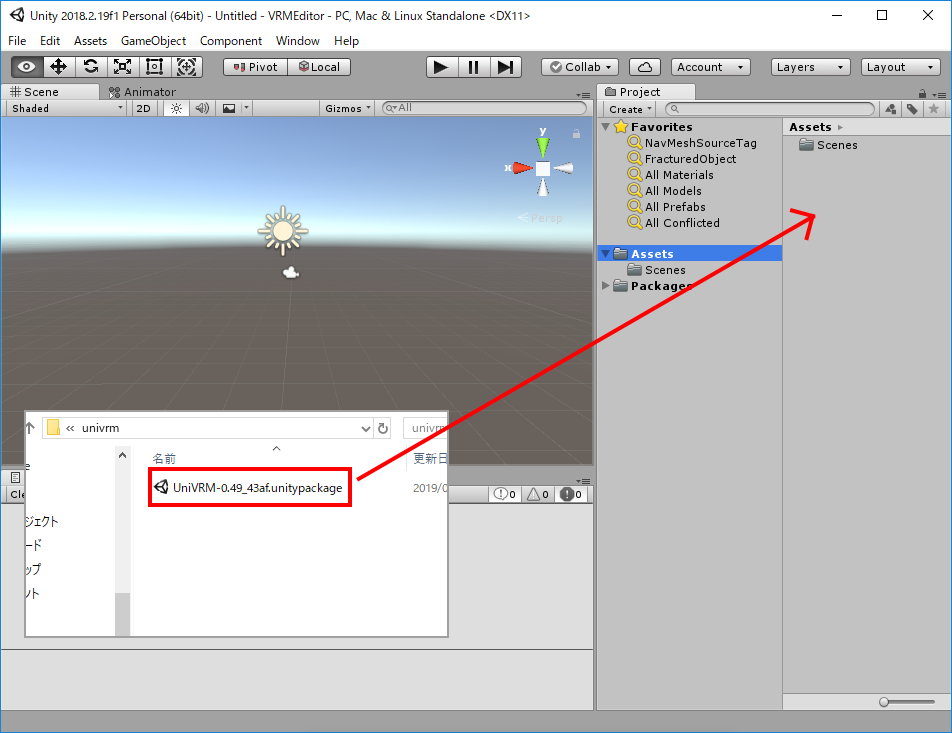
Drag and drop the downloaded UniVRM unitypackage into the Assets folder.
The [Import Unity Pakcage] dialog appears. Click on [Import].
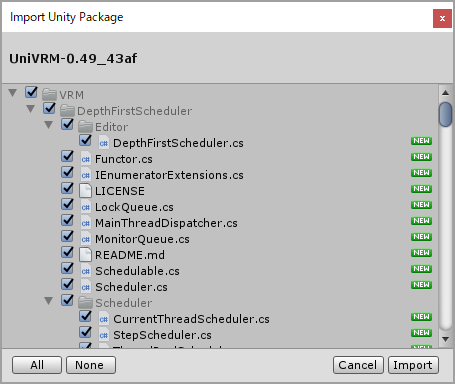
The import is complete if you could see [VRM] menu in the Unity menu bar.

Adding a FBX model
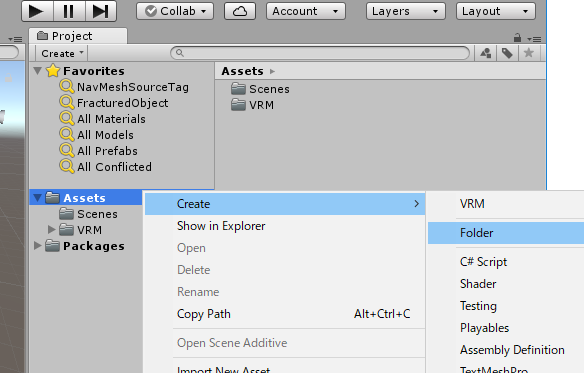
Create a folder for importing an FBX models.
Right-click on the Assets folder and select [Create] > [Folder] to create a new folder.
You may name it the way you find easy to recognize. For this time, we will name the folder “Model.”
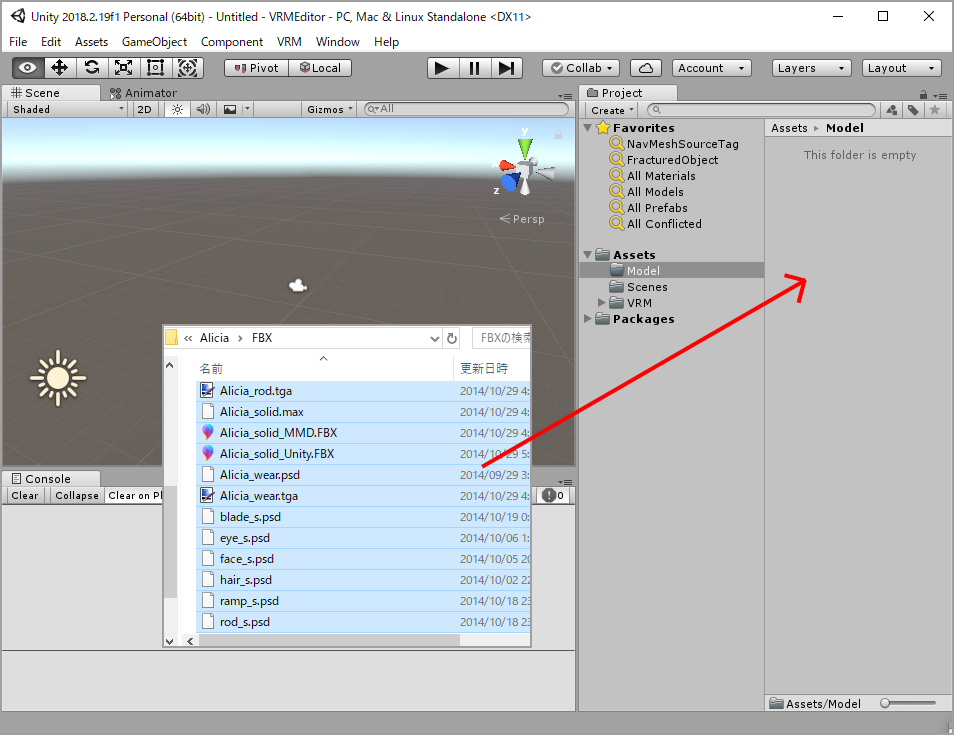
Drag and drop the FBX and texture files to convert to VRM into “Model” folder.
In this example, we will convert a FBX from Alicia Solid into VRM.
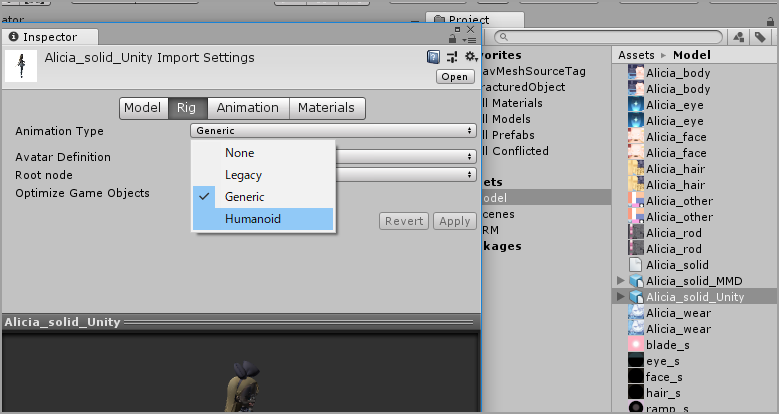
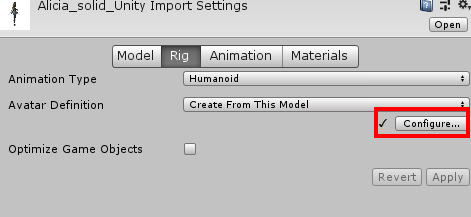
After you have finished copying the set of FBX file, configure the FBX file as a Humanoid model.
- Select the FBX file to convert
- In the Inspector pane, Click on [Rig] tab (If the Inspector pane is not displayed, from the menu, select [Window] > [General] > [Inspector]).
- Change the Animation Type to [Humanoid] and click [Apply].
Humanoid bone settings
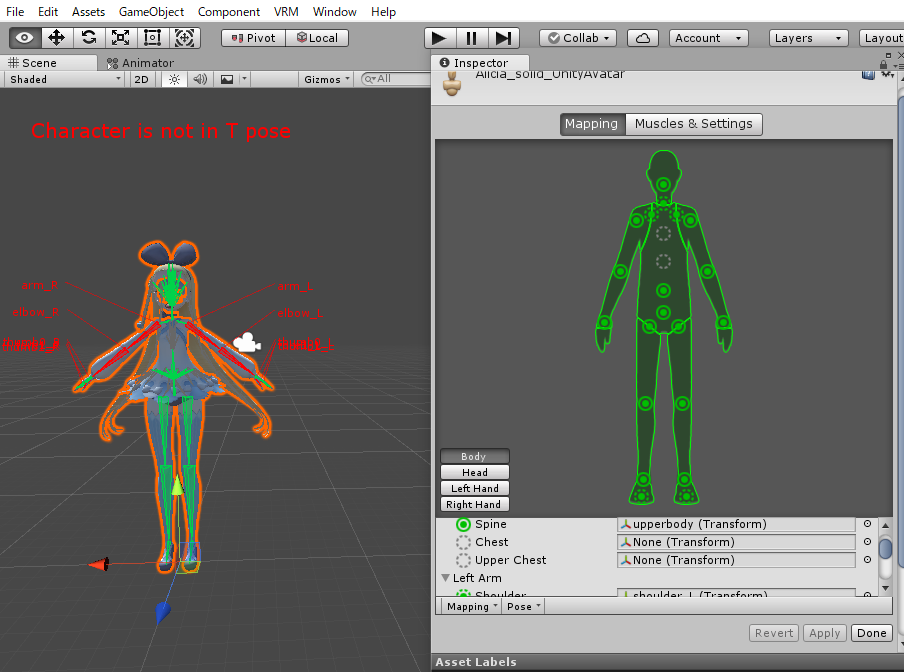
After you have configured the FBX file to be a Humanoid model, check the bone configuration.
Click [Configure…].
If you are asked to save the scene, save it with any name you like.
The screen changes and shows Humanoid bone setting screen.
It the model is recognized with correct bones, every body parts in the Inspector turn green.
If this is the case, you have nothing to do so click [Done].
If some parts of the body are red, there is some trouble recognizing bones. In this case, please refer to Troubleshooting:Invalid Humanoid bone configuration.
Configuration of material
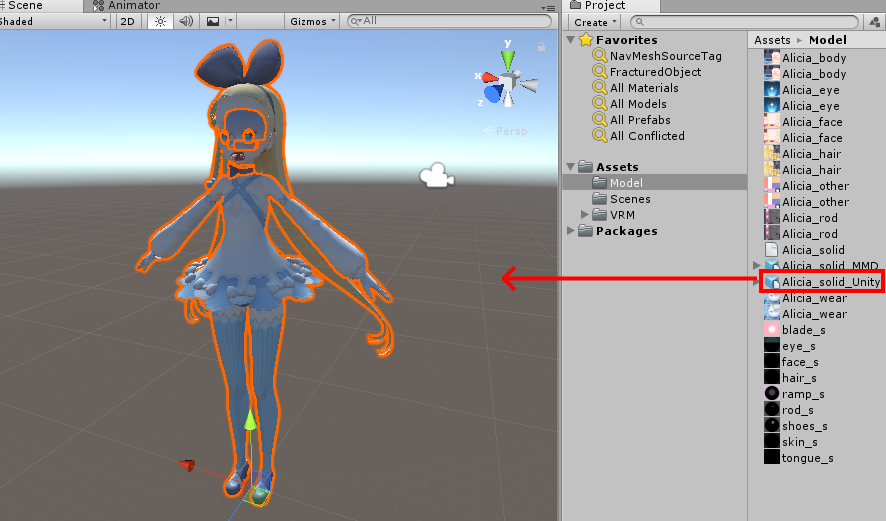
Place the FBX configured to be a Humanoid model into the scene.
Drag and drop the FBX file in the Project folder into the Scene window.
When you select an object for the body or an eye, you can see a material is being assigned to the object.
Change the material for each shader to VRM/MToon which is recognizable by VRM file. Also, the color of shadow is set to pink by default, change this to white or gray.
Depending on the version of Unity, you may not be able to change the materials.
In that case, please refer to Troubleshooting:Cannot edit materials.

Create meta data for VRM
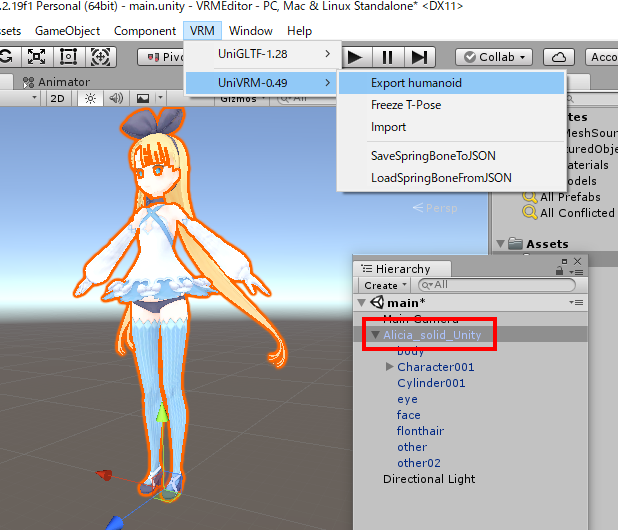
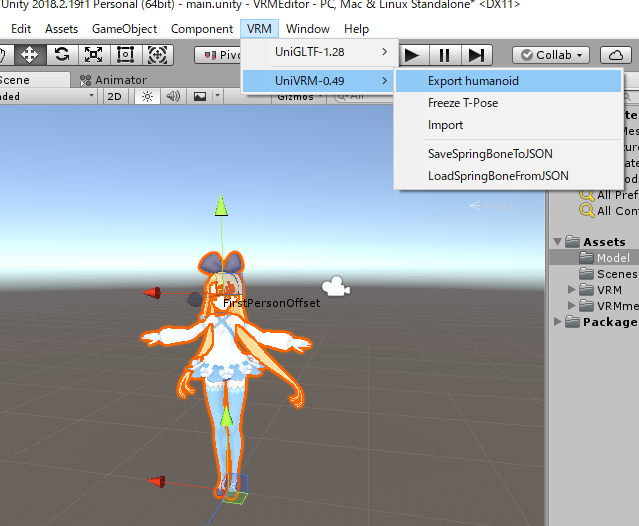
When you are finished with setting up materials, select the root object of the model (the object at the top of the hierarchy),
then from the menu bar select [VRM] > [UniVRM-0.53] > [Export humanoid].
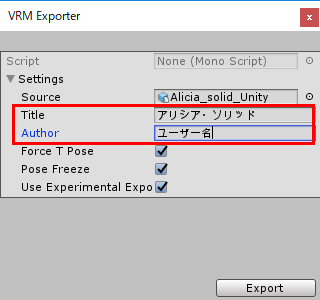
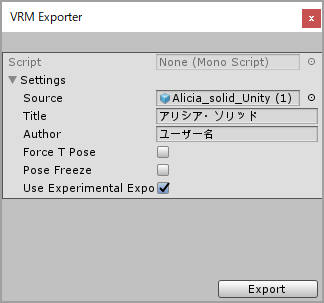
A window named VRM Exporter will show up. Enter the model name in [Title] and the author name in [Author] then click [Export].
If you see the error message shown below, the FBX file is not set up as a Humanoid model. Please refer to Humanoid bone settings to configure it correctly.
Error: Animator.avatar is not humanoid. Please change model's AnimationType to humanoid. Require
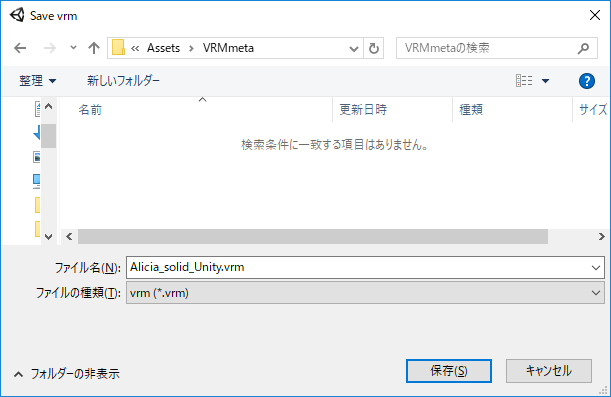
You will be asked for the place to save the file. Create a new folder for easy management.
You may name it the way you find easy to recognize. For this time, we will name the folder “VRMmeta.”
You cannot export the file if any error occurs during the export.
A common cause may be lack of material and mesh data assignment.
This could occur when you delete some objects during the setup. Please confirm that you have followed the instructions to this point.
Edit metadata for VRM
A prefab file is automatically created, when you are finished with exporting metadata for the VRM. Drag and drop the prefab into the scene.
You may delete the model you have edited from the scene if you like.
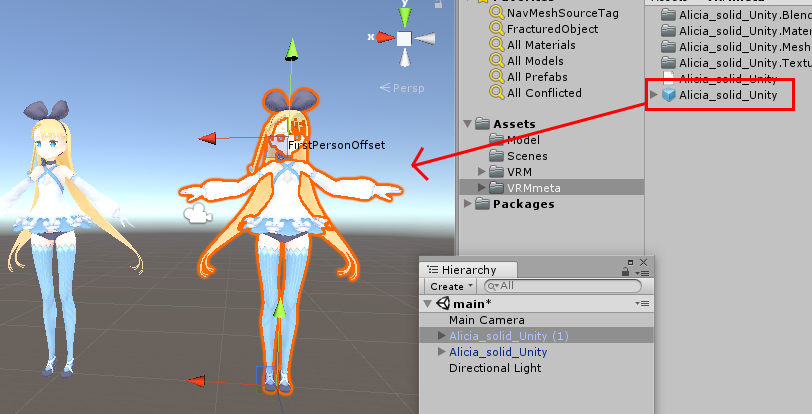
 When you select the object, you will see that various scripts are added to the object, such as VRM Meta.
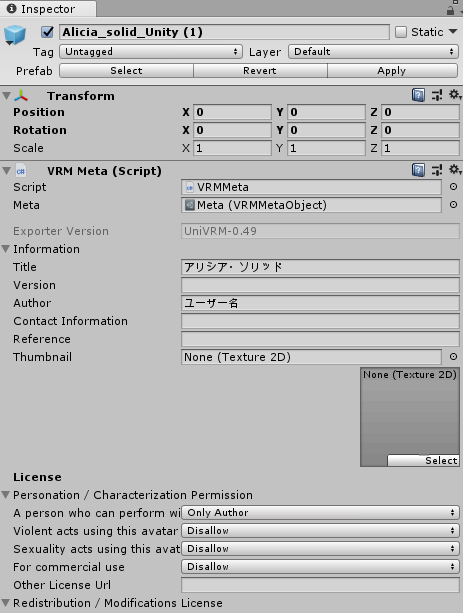
In here, you can enter information and terms of use for the model. Here, we will explain some of the most important items.
When you select the object, you will see that various scripts are added to the object, such as VRM Meta.
In here, you can enter information and terms of use for the model. Here, we will explain some of the most important items.
Information
| Item | Required | |
|---|---|---|
| Title | Name of the model | ◯ |
| Version | Version of the model | |
| Author | Name of the author | ◯ |
| Contact Information | Your contacts | |
| Reference | If this model is a derivation of a parent creation, reference to the parent (URL and such) | |
| Thumbnail | Thumbnail picture |
License
A person who can perform with this avatar
The person allowed to give a persona to the avatar. Acting with this avatar is only permitted to the person specified here.
- Only Author
- Explicitly Licensed Person (It is not compatible with Virtual Cast as of now)
- Everyone
Violent acts using this avatar
Whether or not act involving violence is allowed with this avatar.
- Disallow
- Allow
Sexuality acts using this avatar
Whether or not act involving sexual expression is allowed with this avatar.
- Disallow
- Allow
For commercial use
Whether or not commercial use of this avatar is allowed.
- Disallow
- Allow
For other settings, refer to UniVRM GitHub.
Export VRM
After you are done with typing in required VRM meta data, it's time to export it as VRM.
Select the root object of the model and on the menu, click [VRM] > [UniVRM-0.49] > [Export humanoid].
 No need to change anything, just click [Export] to save it in any directory.
The file you just exported is the VRM file.
To use it on Virtual Cast, Upload an Assets.
en/vrm/make.txt · Last modified: 2023/03/08 18:12 by pastatto