User Tools
Site Tools
Sidebar
Table of Contents
How to cope with troubles in Unity
Error in Humanoid bone settings
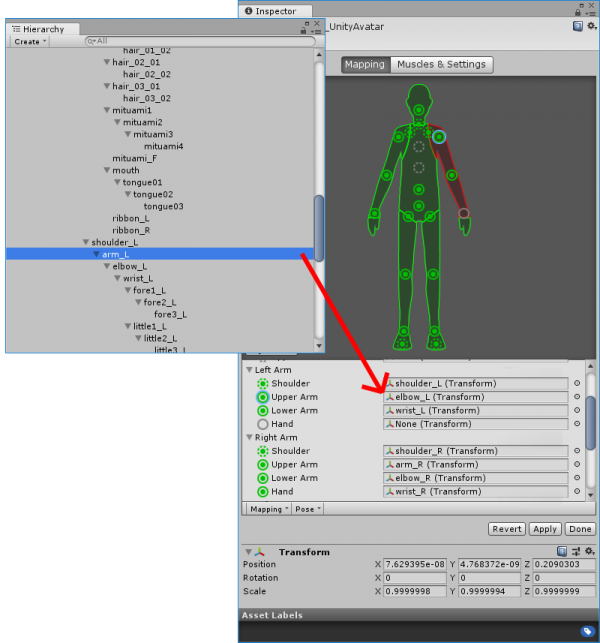
There may be cases when Humanoid bones are not configured properly and shown in red.
In this example, [UpperArm] is supposed to come after the [Shoulder], but the [Elbow] bone has taken over the place resulting in disarranged order.
Drag and drop correct bones from the Hierarchy to the list to configure the bones correctly, which then will turn the Humanoid bones green.
Cannot edit materials
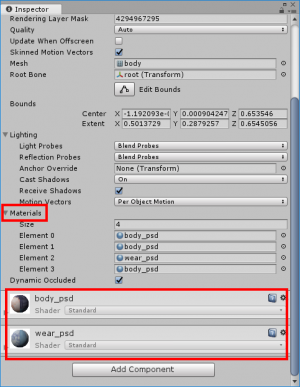
In the latest version of Unity, there may be cases where a material is shown in gray, which cannot be edited.
In this case, you can duplicate a material and create a new material to edit it.
In the Inspector tab, click on [Materials] to show the list of registered materials.
Clicking on a registered material will refer you to the source of the material.
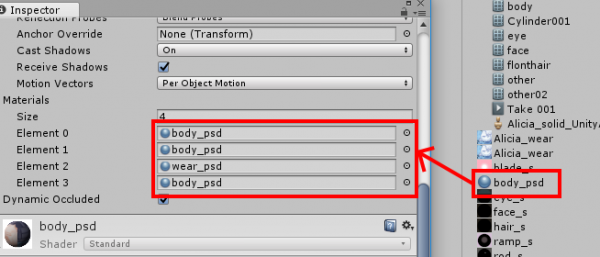
Click on this material and press [Ctrl + D] to duplicate the material.
Drag and drop the duplicated material to the list of the materials you've seen in the previous steps.
Now you can edit the material.
Exported model is invisible. The position, rotation, scale is not correct
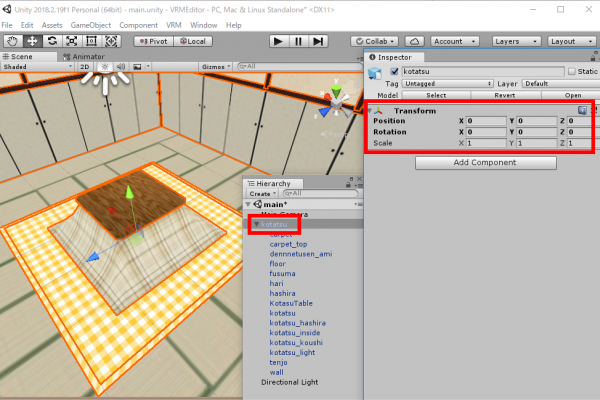
When the position, rotation or scale of a model exported as VRM or GLB is incorrect, it may be the case that the Transform value of the root object selected at the time of export has abnormal value.
During the export, the Scale is automatically adjusted to 1, and the Position and the Rotation are set to 0. For example, when you export an item with its root scale set to 100, it will be adjusted to the size of 0.01x, which is barely visible.
When exporting, fix the Transform values as shown below.
An animation slows down
Unity automatically slows down the start and the end of the animation to make the animation look smooth.
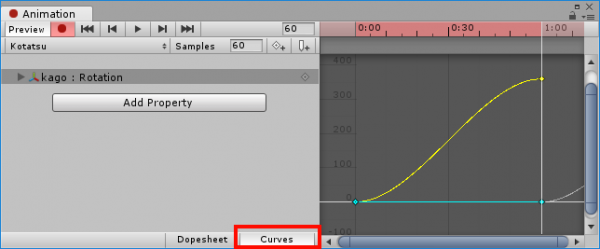
To change this setting, in the [Animation] window, click on Curves.
The curve graph below will be displayed.
This timeline shows the change in rotation and position.
By straightening the curve, you can create an animation that continually rotate in a fixed speed.


