Table of Contents
Importing VCI UnityPackage
In order to create VCI, you need to download and install the following files.
(This is the minimum configuration which doesn’t include the creation of VCI scripts)
Download required files
UniVCI-x.xx.unitypackage
Download latest version of UniVCI Unity Package from Virtual Cast GitHub.
VCI/Releases (UniVCI-x.xx.unitypackage)
Unity-2018.xx
Download and install Unity-2018.xx from Unity Download Archive.
You can use any versions as long as it’s 2018.
Note: No matter what version of Unity you use, you need to change the version of .NET to .NET4.x in the Unity Editor. **
You can facilitate the use of multiple Unity versions by using UnityHub.
We recommend you to use UnityHub.
Create a project for VCI
Creation of a new project
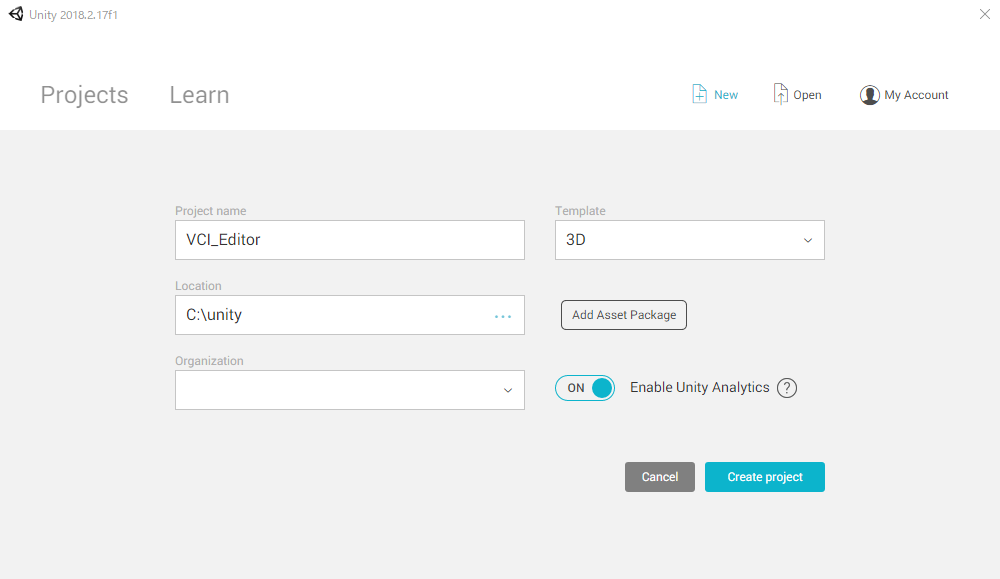
Open Unity and click on [+New] button to open the window for creating new project.
Configure each text boxes as shown below and click [Create Project] to create the project.
[Project name]: [VCI_Editor] (or any name)
[Template]: [3D]
[Location]: [(Specify any folder)] (the default should be fine)
[Organization] > [(the default should be fine)]
<Important> Set the runtime to .Net 4
[Edit] > [Project Settings] > [Player]
Other Settings

Import package
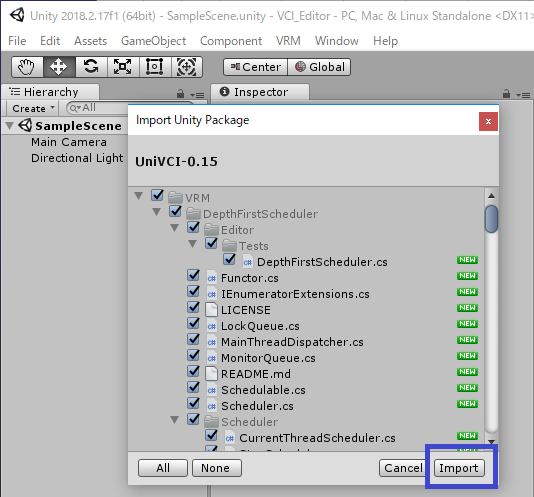
After the project is opened, double click on the downloaded [UniVCI-x.xx.unitypackage] to import the package.
Assets/VRM/VCI/Scripts/IO/AudioClipMaker.cs(5,24): error CS0234: The type or namespace name `Tasks' does not exist in the namespace `System.Threading'. Are you missing an assembly reference?
If you see the error message shown above in the console
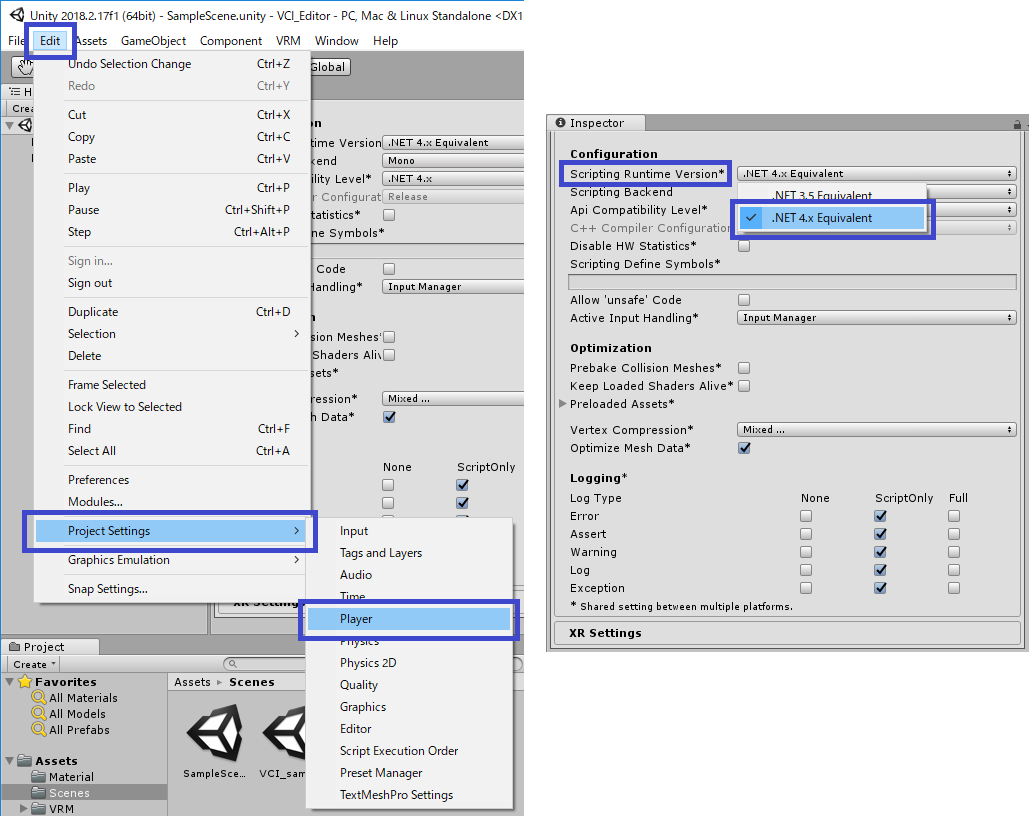
On Unity menu bar, select [Edit] > [ProjectSettings] > [Player] to open [PlayerSettings].
On [PlayerSettings], Change the [Scripting Runtime Version] to [.NET 4.x Equivalent].
Confirm the successful installation of VCIPackage
After you change it to [.NET 4.x Equivalent], the Unity Editor relaunches.
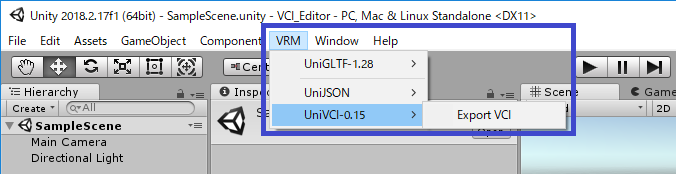
The installation is successful if you can see [VRM] in the menu bar.
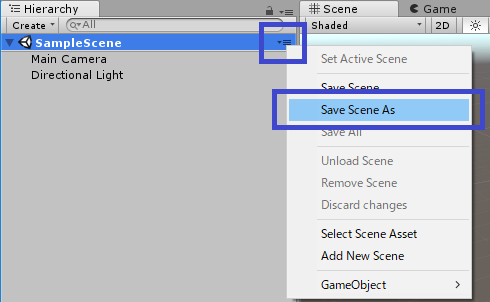
Save the scene
 1
1
On [Hierarchy], select [▼Ξ] > [Save Scene As] to save the scene for VCI setup.
Name it something easy to understand (“VCI_sample” for instance) and save it in “Scene” folder.
Make sure to save the scene used for the setup, as you will be needing it after you exported VCI.